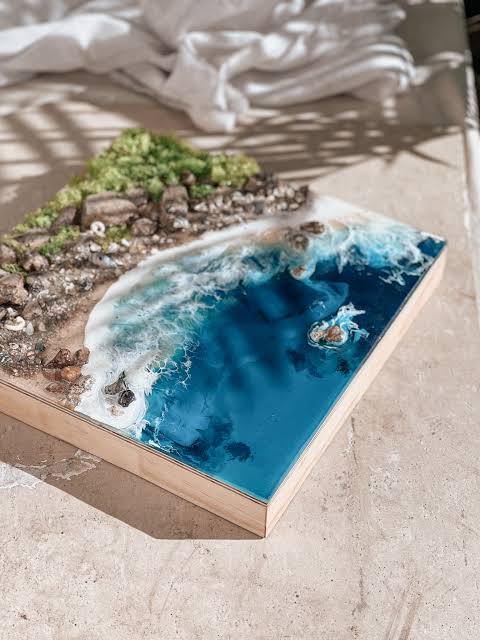
Tips and Tricks for Resin Art Beginners

Resin art has gained popularity among artists and DIY enthusiasts for its versatility and the unique, glossy finish it provides. If you're new to the world of resin, the process may seem a bit overwhelming at first. But don't worry! In this article, we'll walk you through some essential tips and tricks to get you started on your resin art journey. Whether you're interested in creating resin flower art or looking for resin art classes near you, this guide will help you lay the foundation for your resin art projects.
Understanding Resin Art
Before you dive into creating masterpieces, it's important to understand what resin art is. Resin is a two-part compound that hardens to a clear, durable finish. Artists mix the resin with hardener, and sometimes add pigments or other decorative items, to create stunning and unique artwork.
Types of Resin
There are different types of resin available, each suited for specific projects. Epoxy resin is the most common for art projects due to its ease of use and clarity. It's perfect for beginners and is widely used for coating artwork, making jewelry, and creating standalone resin pieces.
Polyester resin is another option, known for its fast curing time and high strength. However, it tends to have a strong odor and can be more difficult to work with, making it less popular for beginners.
Safety Precautions
Safety should be your top priority when working with resin. Always work in a well-ventilated area, wear gloves to protect your skin, and consider using a respirator mask to avoid inhaling fumes. It's also a good idea to protect your work surface with a silicone mat or plastic sheeting.
Getting Started with Resin Art
Artist preparing resin mixtureby Tim Mossholder (https://unsplash.com/@timmossholder)
Once you've familiarized yourself with the basics of resin, you're ready to start your first project. Here's how to get going:
Choosing the Right Workspace
Select a workspace that is dust-free, as dust can ruin the surface of your resin. The room should be well-ventilated and have a flat surface to ensure even curing. Temperature is also important; aim for a room temperature of around 70-75°F (21-24°C) for the best results.
Gathering Your Materials
You'll need the following items to begin:
Epoxy resin and hardener
Mixing cups and stirring sticks
Gloves and safety mask
Pigments or dyes (optional)
Decorative inclusions like flowers, glitter, or beads (optional)
A torch or heat gun to remove air bubbles
Mixing and Pouring the Resin
The key to a successful resin project is following the manufacturer's instructions closely. Measure the resin and hardener precisely, and mix them thoroughly to ensure proper curing. Avoid whipping the mixture, as this can introduce air bubbles.
Pour the resin slowly onto your project and use a torch or heat gun to gently heat the surface, which helps remove any air bubbles that have formed.
Resin Art Techniques for Beginners
Now that you have the basics down, let's explore some techniques that can add flair to your resin creations.
Creating Resin Flower Art
Resin flower art is a beautiful way to preserve flowers in a clear, glossy medium. To create resin flower art, you'll need to dry your flowers completely before embedding them in resin. You can use a book or a flower press to dry them flat, which makes them easier to work with.
Once dried, arrange the flowers in your mold or on your surface, mix and pour the resin, and then carefully place the flowers into the resin before it cures.
Adding Color and Effects
Adding pigments to your resin can transform your project. You can use liquid dyes, mica powders, or even acrylic paints to color resin. Experiment with different techniques like swirling, layering, or using additives like glitter or gold leaf to create unique effects.
Using Molds
Silicone molds are perfect for beginners as they are flexible, reusable, and come in various shapes and sizes. Make sure to use a mold release agent or a thin layer of cooking oil to ensure your cured resin piece comes out easily.
Troubleshooting Common Resin Issues
Even experienced resin artists encounter issues from time to time. Here are some common problems and how to fix them:
Sticky or Soft Resin
If your resin is sticky or hasn't fully cured, it may be due to incorrect measurements or inadequate mixing. Make sure to measure accurately and mix thoroughly. If the problem persists, you may need to apply an additional layer of properly mixed resin.
Bubbles in the Resin
Bubbles can form if you mix too vigorously or pour too quickly. Use a torch or heat gun after pouring to pop the bubbles, and pour in layers if you're working with deep molds.
Cloudy Resin
Resin can turn cloudy if it's exposed to moisture. Always work with dry materials and tools, and store your resin and hardener in a dry place.
Finding Resin Art Classes Near You
Resin art workshop by Arteanu By Anushka (https://instagram.com/arteanu)
If you're looking to improve your skills or need some hands-on guidance, consider attending resin art classes. You can find workshops at local art centers, community colleges, or even specialty craft stores. Online platforms also offer virtual classes where you can learn from the comfort of your own home.
Conclusion
Resin art is a rewarding and creative hobby that allows for endless possibilities. By understanding the basics, choosing the right materials, and practicing your technique, you'll quickly become more confident in your abilities. Remember to always prioritize safety, be patient with the curing process, and don't be afraid to experiment.
Whether you're interested in creating jewelry, home decor, or resin flower art, the most important tip is to have fun and let your creativity flow. Happy crafting!
-
Posted in
resin art, resin art classes near me, resin flower art
